

Introduction
If you have ever tried to add a custom model into Source Filmmaker and it did not work, you are not alone. Many beginners get stuck during the build process. The model may not show up, textures may be missing, or strange error messages may appear. This is usually a problem with the compile process.
Learning sfm compile is important if you want your models to work correctly inside Source Filmmaker. When done right, your character or prop will load with proper textures, animations, and physics. When done wrong, nothing works.
This guide explains everything in simple language. You will learn what compiling means, how QC files work, what tools you need in 2026, how to fix common errors, and how to test your model inside SFM. By the end, you will feel confident using the sfm compile workflow for your own projects.
What Does Compiling Mean in Source Filmmaker?
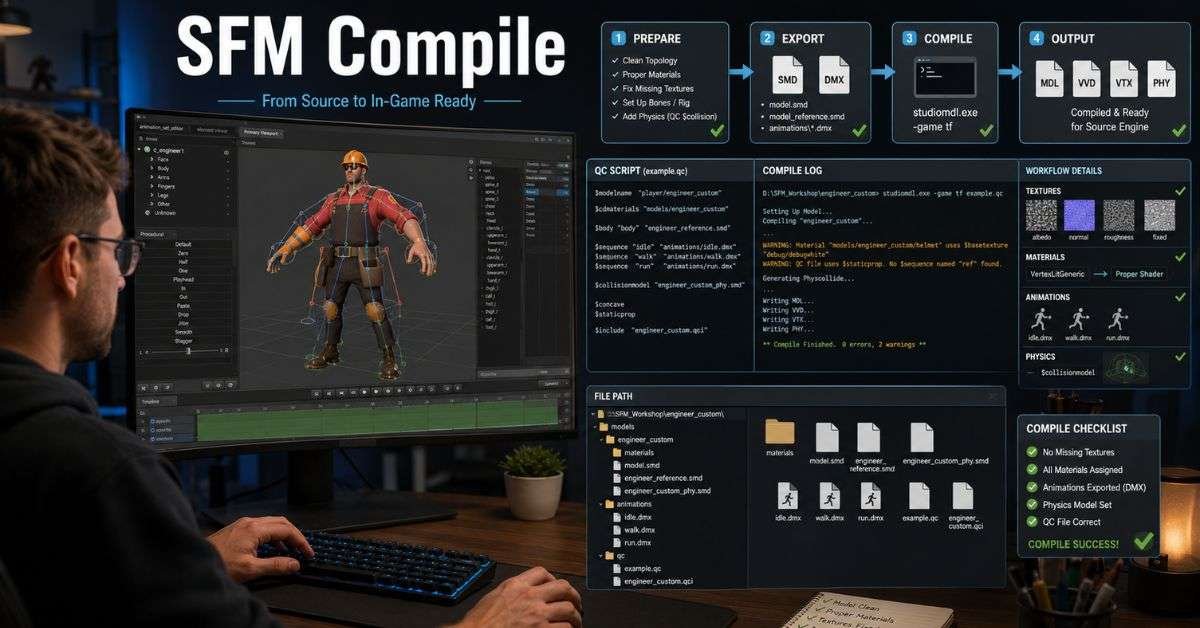
Compiling is the process of turning your 3D model files into a format that the Source engine can read. When you create a model in Blender, it is saved as a .blend file. Source Filmmaker cannot read that file directly. You must export it as SMD or DMX, then compile it into files like MDL, VVD, and VTX. In simple words, sfm compile converts your model into game-ready files.
Without compiling:
- Your model will not appear in SFM
- Textures may be missing
- Animations may not work
- Physics will not load
Think of compiling like baking a cake. You mix ingredients (model files), follow instructions (QC file), and bake it (compiler tool). If one step is wrong, the cake fails.
Tools You Need in 2026
Before starting the sfm compile process, make sure you have the correct tools installed. Using outdated tools often causes errors. Here is a simple table of the main tools:
| Tool | What It Does | Recommended Version (2026) |
| Blender | Create and rig models | Blender 4.x LTS |
| Blender Source Tools | Export SMD/DMX files | Latest GitHub version |
| Crowbar | Compile and decompile models | Version 0.75+ |
| VTFEdit | Convert textures to VTF format | 2026 build |
Crowbar is the main tool used for compiling. It reads your QC file and creates the final model files. Always make sure your Blender version matches the Blender Source Tools version. If they do not match, export errors can happen.
Understanding QC Files in Simple Words
A QC file is a text file that gives instructions to the compiler. It tells the engine:
- What the model name is
- Where the textures are
- What animations to use
- Whether physics should be included
Here is a basic QC example:
- text
- $modelname “myfolder/mymodel.mdl”
- $body body “mymodel_reference.smd”
- $cdmaterials “models/myfolder/”
- $sequence idle “mymodel_idle.smd” fps 30
Each line has a job. If you spell a file name wrong, the compiler will fail. If the material path is wrong, your model may appear pink and black. Most problems during the sfm compile process happen because of small mistakes inside the QC file. Always double-check spelling and file paths.
Preparing Your Model in Blender
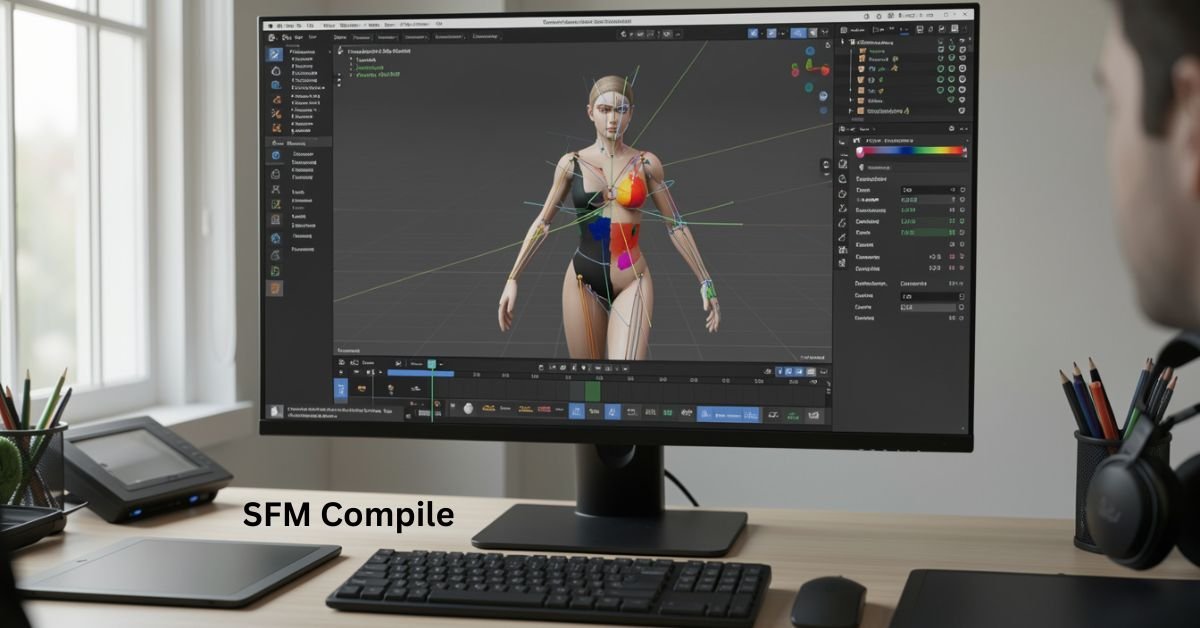
Before exporting, you must prepare your model correctly. A lot of beginners skip this step and then make mistakes.
- First, apply scale in Blender. Press Ctrl + A and choose “Scale.” Source uses a smaller unit size than Blender, so scale matters.
- Second, check your armature. Make sure bones are named properly and there are no extra unused bones.
- Third, clean your mesh. Remove duplicate vertices and fix broken normals.
If your model is not clean before export, the sfm compile process may show errors like “too many bone influences” or physics problems. Taking 10 extra minutes in Blender can save hours of troubleshooting later.
Exporting SMD or DMX Files
After preparing your model, you must export it. There are two main export formats:
- SMD is older but still widely used.
- DMX is newer and more stable.
In 2026, most creators prefer DMX because it handles animations better.
When exporting:
- Select the correct armature
- Export reference mesh
- Export each animation separately
- Make sure file names match your QC file
If the file name in your QC says “idle.smd” but your exported file is “Idle.smd,” it may fail on some systems. Always match names exactly. Correct export is a key part of a successful sfm compile workflow.
Step-by-Step Compile Process
Now let’s go through the full process step by step.
- Open Crowbar.
- Go to the Compile tab.
- Set your game directory to the SFM usermod folder.
- Select your QC file.
- Click Compile.
Crowbar will show a log window. Read it carefully. If you see the word “ERROR,” something must be fixed. If everything works, your model files will be created in the models folder. The sfm compile step may look scary at first, but once you understand the pattern, it becomes easy.
Output Files Explained
After compiling, you will see several new files in your models folder. Here is what they mean:
| File Type | Purpose |
| .mdl | Main model file |
| .vvd | Vertex data |
| .dx90.vtx | Graphics data |
| .phy | Physics file |
| .ani | Animation data |
If your .mdl file is missing, the compile fails. If your model appears but has no physics, check the .phy file. Understanding these files helps you debug problems faster during sfm compile troubleshooting.
Common Errors and How to Fix Them
Errors are normal, especially for beginners. Here are some common problems. “Cannot find SMD file” means your QC file path is wrong. “Too many bone influences” means a vertex is affected by too many bones. Limit each vertex to three bones in Blender.
The model appears pink and black, meaning textures are missing. Check the $cdmaterials path and make sure VTF files are inside the materials folder. “Unknown command” means there is a typo in the QC file.
Most errors can be fixed by reading the compile log carefully. Do not ignore warnings either. Sometimes warnings cause issues later in SFM. Fixing errors becomes easier as you gain experience with sfm compile logs.
Testing Your Model in Source Filmmaker
After compiling, open Source Filmmaker. Go to the Model Browser and search for your model folder. If it does not appear, restart SFM.
Spawn the model into the scene. Check:
- Are textures correct?
- Do animations play smoothly?
- Is the model the correct size?
- Does physics behave properly?
If something looks wrong, return to Blender or your QC file and adjust. Compiling is often a repeat process. Even professionals recompile models several times before final release. Testing carefully ensures your sfm compile process is successful.
Best Practices for Smooth Compiling
If you want fewer problems, follow these simple habits.
- Keep file names short and simple.
- Use lowercase letters for folders.
- Always organize models and materials clearly.
- Keep backups of working QC files.
Also, try to keep polygon counts reasonable. Very high-poly models can slow down SFM or cause crashes. A clean workflow makes the sfm compile process much faster and less stressful. As you gain more experience, you can explore advanced features like bodygroups, flex controllers, and LOD models. But start simple and build confidence first.
FAQs
What is the SFM compile used for?
It converts exported model files into Source Engine model files.
Why is my model invisible after compiling?
Most likely the material path is wrong or textures are missing.
Should beginners use SMD or DMX?
DMX is recommended in 2026 for better stability.
Where do compiled files go?
They are placed inside the usermod/models folder.
How do I reduce bone influence errors?
Limit each vertex to a maximum of three bone weights in Blender.
Conclusion
Learning the sfm compile process may seem hard at first, but it becomes simple once you understand each step. You create a clean model in Blender, export it correctly, write a proper QC file, compile with Crowbar, and test inside Source Filmmaker. Most problems happen because of small mistakes like wrong file names, incorrect paths, or missing textures. By checking your work carefully and reading compile logs, you can fix almost every issue.
Take your time, practice with simple models, and build your skills step by step. The more you use the sfm compile workflow, the easier it becomes. Soon, you will be able to create fully working custom characters and props without fear of errors.